Kumihimo bracelets
Introduction
This tutorial is supposed to teach you how to make Kumihimo friendship bracelets.
What you need
String
You will need string in different colors. You can use almost all kinds of string, but I prefer to use a little more thick string than in ordinary friendship bracelets.
Kumihimo disk
You will also need a Kumihimo disk. Such disk can be bought from craft stores. You can make your own disk out of cardboard. Here is how to do it:
1. Print this kumihimo disk template
2. Glue it onto stiff cardboard.
3. Cut out the disk using a knife (take help from your parents). You can also use scissors but it's easier and gives better results with a knife.
How to make a simple bracelet
In this section I will show how to make a simple spiral kumihimo bracelet. The goal is to teach you the very basic kumihimo tying moves.
Setup strings
For this bracelet, you will need four blue strings and four orange strings (you can of course use any other color). To start, you need to bunch all strings together using an overhand knot or similar.
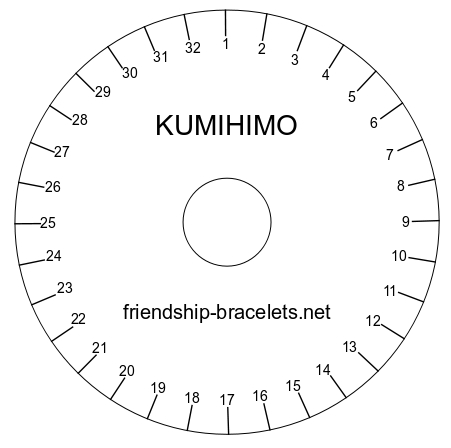
The second step is to mount the strings onto your kumihimo disc. Put the starting knot in the middle hole in the disc, and then put the orange strings in slots 1, 2, 17 and 18. Put the blue ones in slots 9, 10, 25 and 26.
Each pair of strings will form something we will call a group. We say that we make a kumihimo bracelet with four groups and two strings in each group. In other patterns, there can be any number of groups and any number of strings in each group.
Tying the bracelet
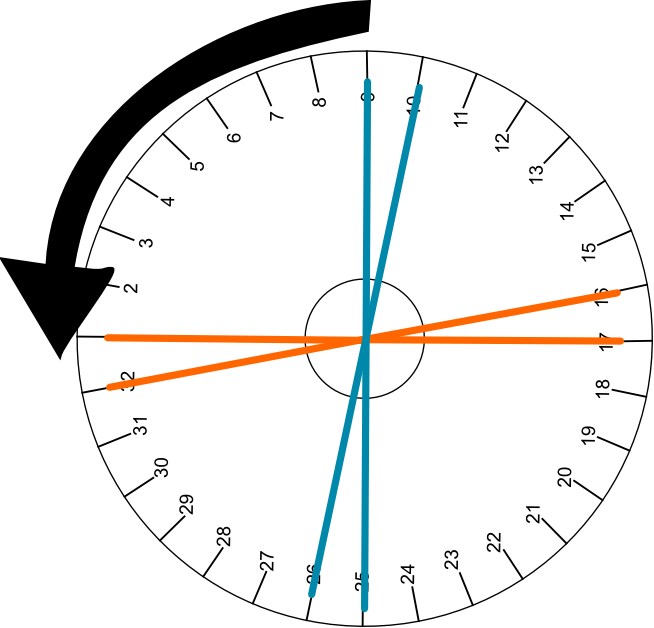
We are now about to tie the bracelet. Fortunately, there is only three moves you have to remember. Start with the group consisting of the orange strings in slots 1 and 2. Let these strings point upwards. In this way, you know what group you are working with.
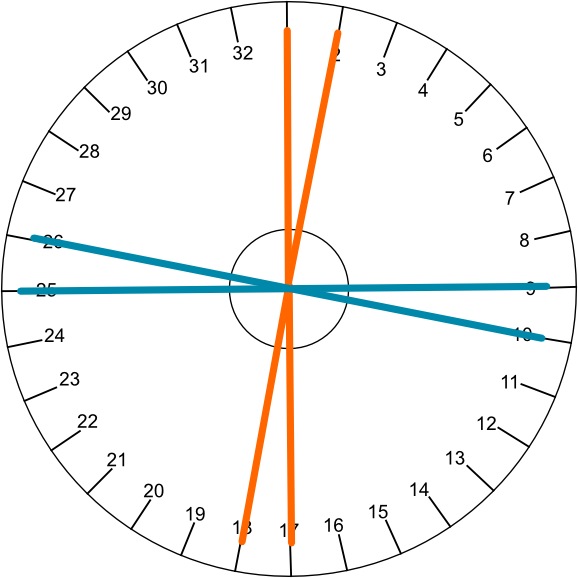
1. Move the string in slot 2 to slot 16, like this:
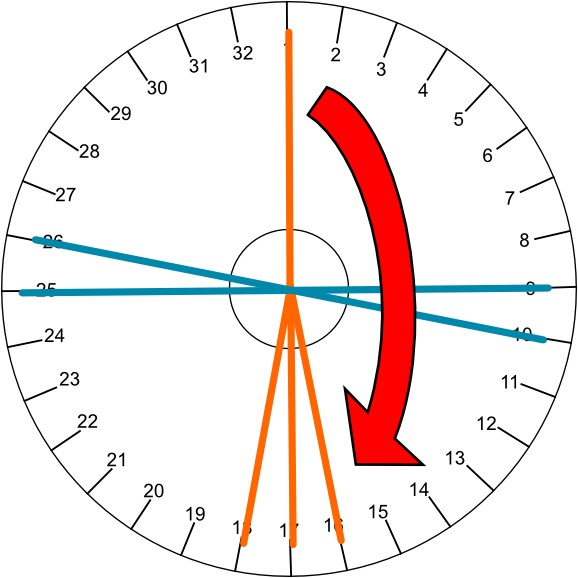
2. Move the string in slot 18 to slot 32:
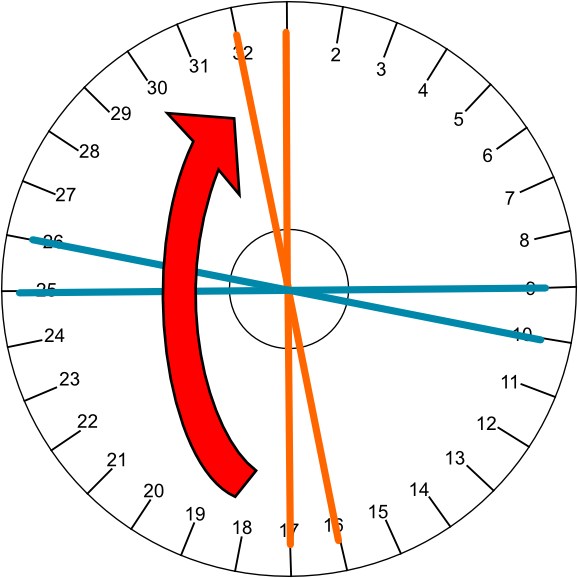
3. Turn the disc counterclockwise so the next group consisting of the blue strings 9 and 10 are pointing up:
You have now done the three basic moves: right string down, left string up, turn disc. You continue in the same way all the time. As you might expect, the next moves are:
4. Move string 10 to slot 24.
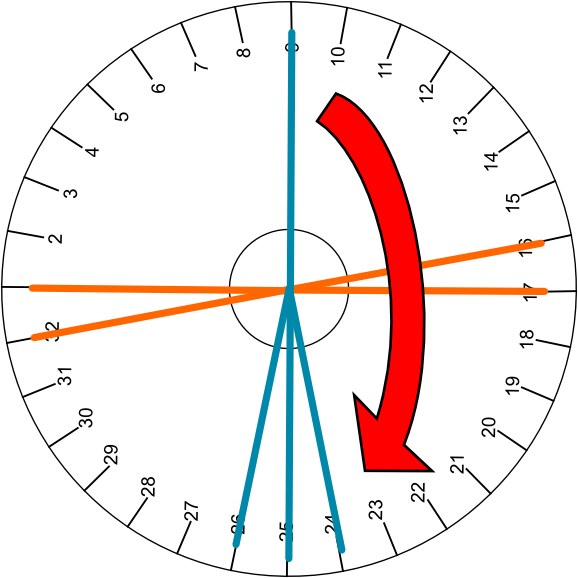
5. Move string 26 to slot 8.
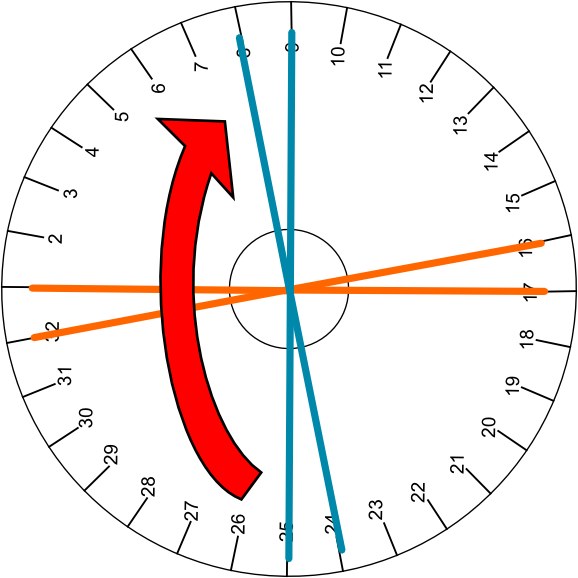
6. Turn the disc counterclockwise so next orange group is facing up. You will notice that the strings are in the same order as we started (the strings are not in the same slots as they begun though).
Continue in the same way and the bracelet will grow, inch by inch, out of the hole on the back side of the disc.
Tying a general Kumihimo bracelet
All patterns do not have four groups with two strings in each. You can choose any even number of groups (4, 6 and 8 are most common) and any number of strings in each group.
General instructions for tying a kumihimo bracelet are:
1. In the current group, move the rightmost string down so it lands directly to the right of the below group.
2. From the below group, move the leftmost string so it lands directly to the left of the current group.
3. Turn the disc counter clockwise so the next group is facing upward. This is the new current group.
4. Go to step 1.
A good and short rule of thumb is "right down, left up".
Tying the spiral Kumihimo bracelet
You need:
A 32 slot kumihimo disc (either store bought or homemade)
4 strands of yarn or thread-2 strands of 2 colors
1. Fold your yarn in half and tie and over hand knot forming a loop. Press the knot through the center of the disc.
2. Warp your disc so that you have color A in slots 1,2,17, and 18. Color B will be in slots 9,10,25, and 26.
3. With slots 1 and 2 at the top, take the bottom left thread and move it to the top left (next to the thread on the top left). Now take your top right thread and move it to the bottom right next to the thread on the bottom). Turn the disc clockwise and repeat.
Repeat step 3 until your bracelet is long enough. Remove from the disv and tie and overhand knot at the end. Trim off ends.
Other patterns
Coming soon!
Videos
something that is not mentioned in the above tutorial is that using a weight of some sort attached to the end of the string going through the center hole of your wheel will keep your "working strings" tight giving you a tighter weave. you can use anything with weight that you can attach to your string , any type of light weight from "fishing line weights" to a "pill bottle full of beads with the child proof lid" <- its what im using lol
Pattern Creation and saving the pattern
Our pattern creator
https://www.friendship-bracelets.net/kumihimogen.php
HOW TO SAVE A COPY OF YOUR PATTERN FROM THE SITE ABOVE
a art program is needed for this!
located on your keyboard is a key called "print scr" or "print screen" or "prt scn", this key literally copies every thing you are seeing on your monitor.
once you have found the Print screen key and have your pattern made, press the key.
once you have pressed the "print screen" key, pull up your art program then go to the "edit/paste" ability and choose paste , this should move the saved copy of the image on your monitor to your art program so you are able to save the image.
Editors
The original author of this tutorial is Stefan .
Comments