Star/Snowflake-Tutorial
Many of you have asked me how to knot the star/snowflake-thing I made and so I just decided to give it a try and make my first (non german) tutorial here.I think this one is not for beginners, maybe you should be a bit more experienced...
I'm not good at writing tutorials and English ist not my mother tongue...I'm sorry, but maybe this is at least a little bit useful...
1.
First take a look at this tutorial and read it carefully -
(it declares some basics you may need to understand my tutorial):
http://friendshipbracelets.superforums.org/viewtopic.php?f=18&t=2405&sid=b0c91997bd206055b7b1de3a4e733471&start=0
Okay, you've learned that this is the way and order you have to add the strings to get a square in the middle of your cross:

and if you do it, it looks like this:

2.
Now we do the very same thing with 6 instead of 4 bundles of strings...
Strings for the 6 bundles:
each:
2 x lime
2 x olive
2 x white
2 x grey
2 x darkviolet
2 x conflowerblue
2 x blue
3.
I started the same way you can find in the cross tutorial, but I began with 6 bundles of strings instead of 4, so the base of my object becomes a hexagon:

instead of a square:
But you fix the strings or bundles together the very same way.
You start with a little ring of 12 knots and add colour by colour like in the cross tutorial.
Then, when every pair of strings of each of the 6 bundles is used, the star in the middle is ready:

The red line shows where you should fix the 6 bundles of strings.
Then you start with the knots marked with "1", then "2", then you add the 2nd colour and tie all knots that are marked with "3", "4", "5"...and so on...
4.
Then you start tying 6 normal bracelets like here
(you don't have to make the same pattern I did, you can also choose an easier arrow pattern like this: https://www.friendship-bracelets.net/pattern.php?id=2 ... this one would be similar to the one I used: https://www.friendship-bracelets.net/pattern.php?id=218)

5.
When they are long enough (about 10 rows each would be okay, I think) you can separate the strings in two bundles and knot some corners (here in an easy candy striped way - one in the left, one in the right direction: https://www.friendship-bracelets.net/pattern.php?id=6858)
Do this with everyone of the 6 star "rays"...so that you have 12 smaller bracelets (with about 9 rows each) forming angles at the end of the 6 straight bracelets. Tie till the smaller ones meet in the middle of the rays.
6.
Then you can fix them together like this:

(you can use the arrow pattern again and unify the striped "rays" like in the picture).
You have to do it 6 times, then your star or snowflake is ready:
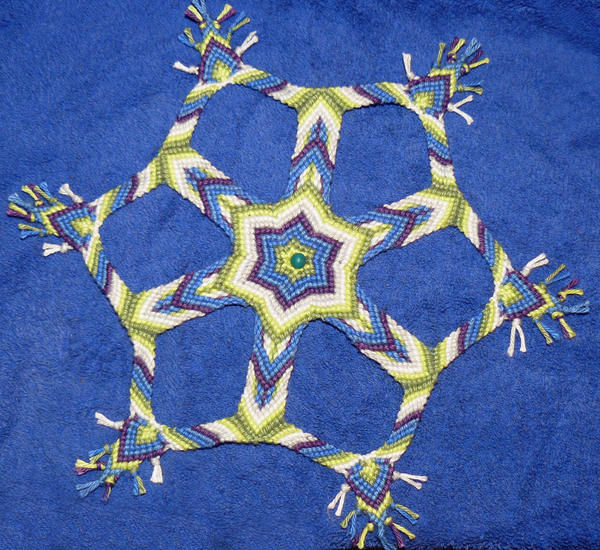
I hope this was useful and at least a bit understandable!
EDIT
I just found a better way how to begin in the middle without strings on the backside!
Here you can find a different way of beginning:

I hope this makes it a lot easier! :)
Editors
The original author of this tutorial is Nimue .
Comments