(( Patterns )) How to tie #25
| Table of contents |
|---|
| 1 - Introduction 2 - Strings & setup 3 - Step 1 4 - Step 2 5 - Step 3 6 - Step 4 7 - Step 5 8 - Step 6 9 - Step 7 10 - Step 8 11 - Step 9 12 - Step 10 13 - Video |
Introduction
This tutorial shows how to tie the square bracelet #25. If you want a printer-friendly version in PDF, click here
Strings & setup
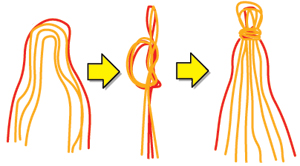
To make this bracelet, you will need yarn or threads in different colours. In this example I've used 8 threads. The length should be about 75 cm when you start to tie. Above you see a solution for starting.
Step 1
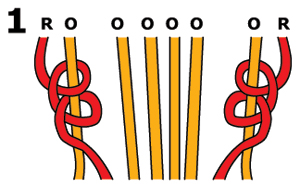
Start with the outer threads and make knots towards the middle as the picture shows.
Step 2
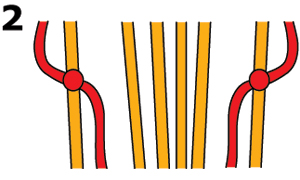
If you've done it right and tightened the knots, it will look about like this.
Step 3
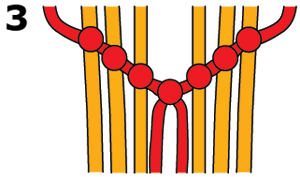
Continue to make knots towards the middle, using the same threads. When they meet, make either a left- or a right-hand knot.
Step 4
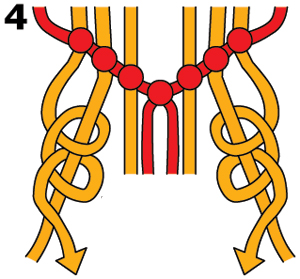
Take the outer threads and make two knots towards the middle on both sides.
Step 5
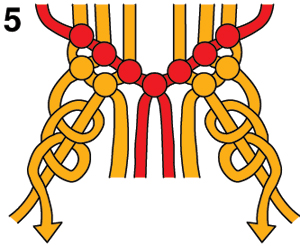
Take the outer threads again and make on both sides one knot towards the middle.
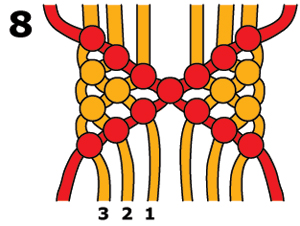
Step 6
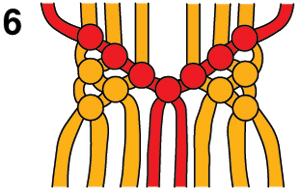
When you're done, it'll look about like this. In the next step you're going to use the threads in the middle and make knots.
Step 7
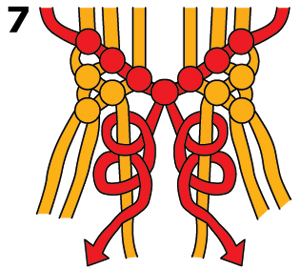
As said, take the inner threads and do as the picture shows.
Step 8
When you're done, it'll look like this.
Step 9
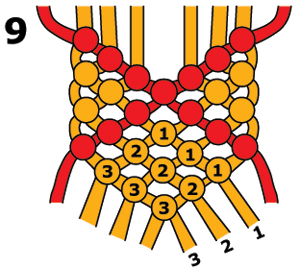
Now, take thread marked 1 in the picture, and make three knots to the right. After that, you can take thread 2 and do the same thing. And after that, with thread 3.
Step 10
Now you can start at step 1 again, and repeat until the bracelet is long enough.
Video
Editors
The original author of this tutorial is Stefan but it was also edited by nin, Jeckle, ririttt, Foz, k_marie, mysterytour, kleinevos and terisan07.
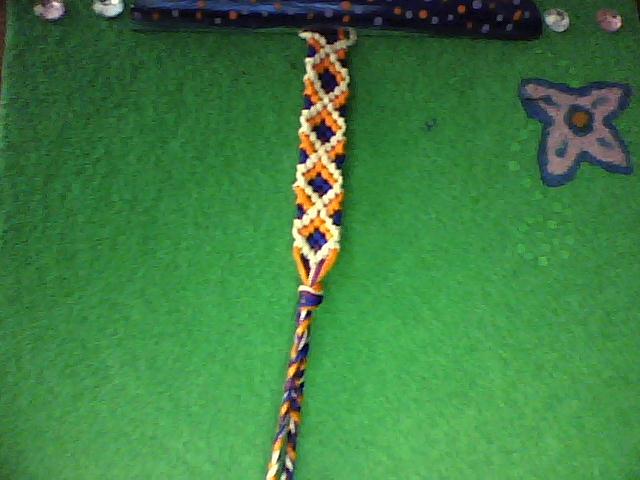
Uploaded photos (see all 1)
Comments