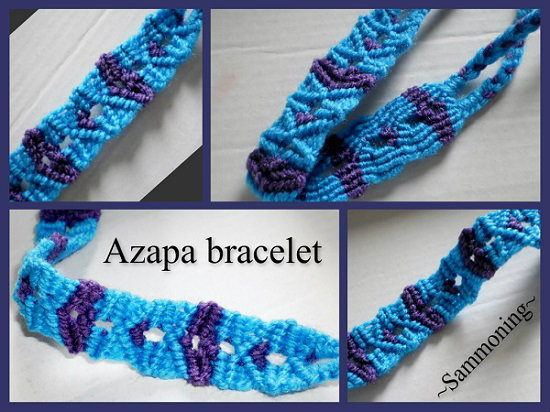
(( Bracelets )) Azapa Bracelet
How to Make the Azapa Friendship Bracelet
Please note: This pattern is not of my own creation. I got the pattern out of a book called How to Make Friendship Bracelets by Veronique Follet. The book is available for purchase on Amazon. Also, this pattern is a bit tricky. It is helpful to read the tutorial through a few times before actually attempting the bracelet. This is an open-work pattern, so there will be intentional holes in the final product.
Step One

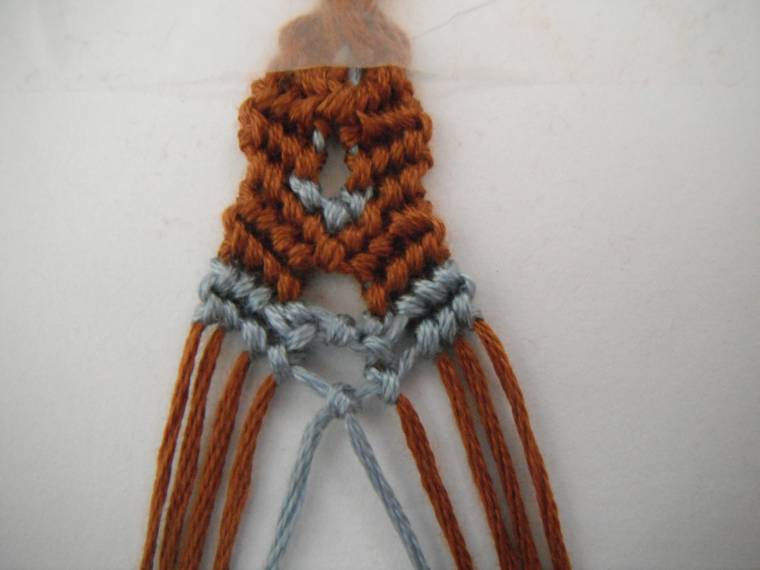
To make this bracelet you will need ten strings. 2 of one color (Blue) and 8 of another (brown). This pattern looks best if contrasting colors are used. Arrange the strings so four brown are on the left side, the two blue are in the middle, and the remaining four brown are on the right side.
Step Two
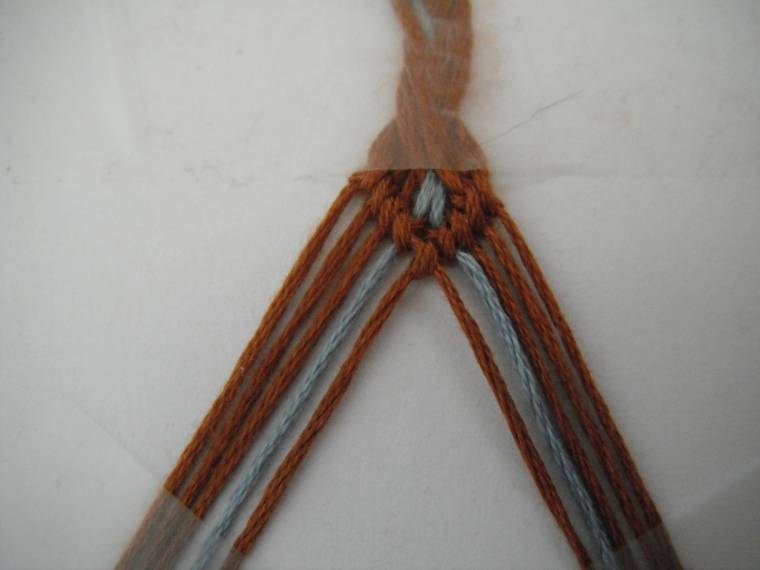
To begin the bracelet start by taking the outermost brown string on the left side and making forward knots down the line. Stop after you've made a forward knot on the blue string. Do the same on the right side, but with backward knots. Once both the brown strings are in the middle, make a forward knot to connect the strings.
Step Three

This step is very important. You will use the two brown strings that were in the middle, and work your way outwards. Using the brown string on the left, you will work back up the strings using backward knots until you reach the outside of the strings. Do the same with the middle brown string on the right, and use forward knots to work your way back out. You should now have two blue strings in the center and four brown ones on each side.
Step Four
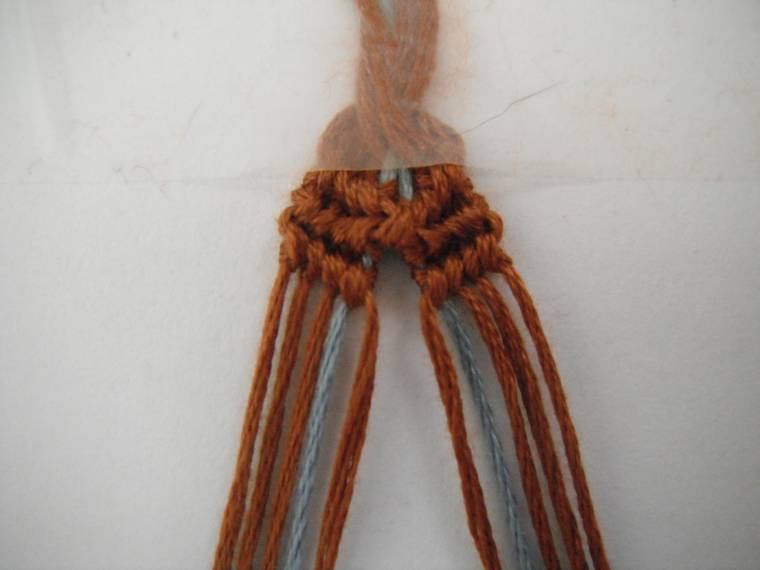
Now using the outermost brown strings, you will work back inwards. Using the outermost brown string on the left, use forward knots to work back into the center. Do the same with the outermost brown string on the rights, using backward knots. DO NOT TIE THE TWO BROWN STRINGS TOGETHER WHEN YOU REACH THE MIDDLE.
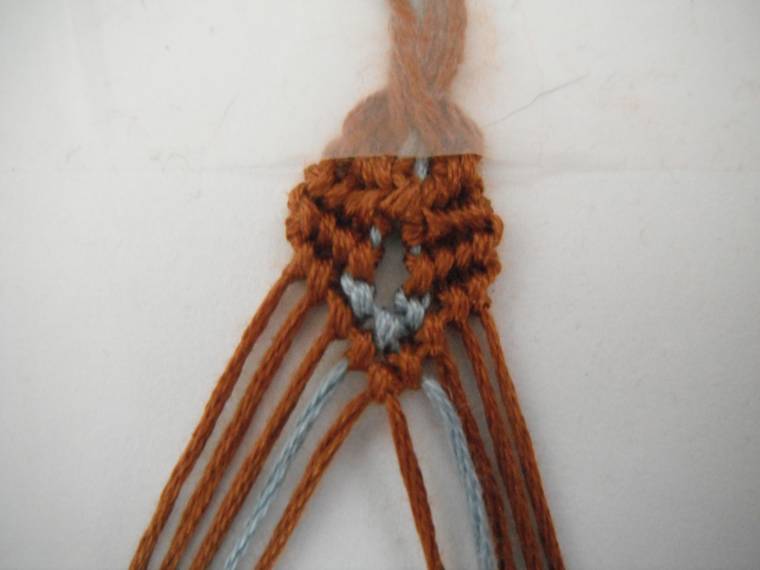
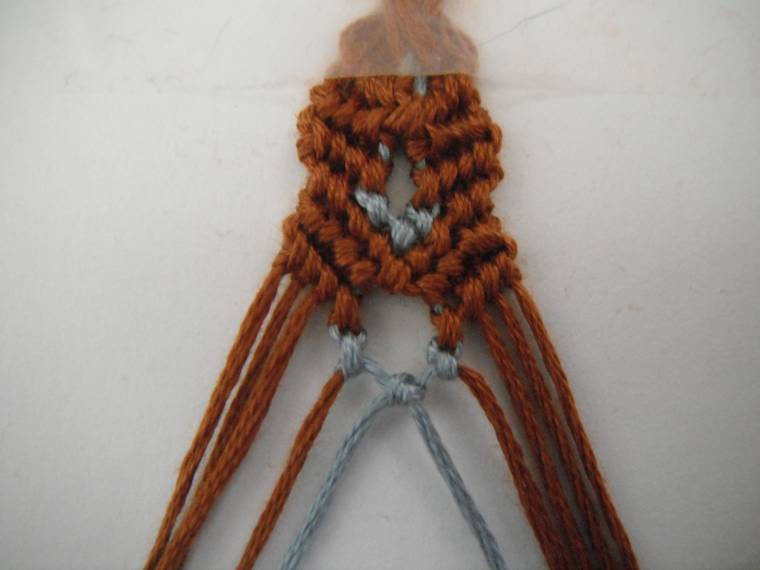
Step Five
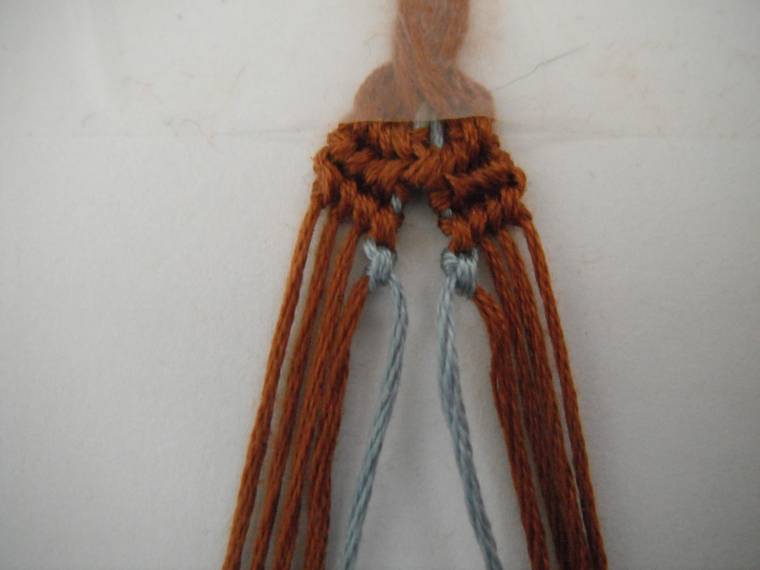
Now you will begin to use the blue strings. With the string that was originally on the left side of the middle brown string, you will make a forward knot onto the brown string so the blue is now in the center. Do the same with the blue string on the right, making a backward knot onto its respective brown string. You should now have to blue strings in the center with four brown on each side.
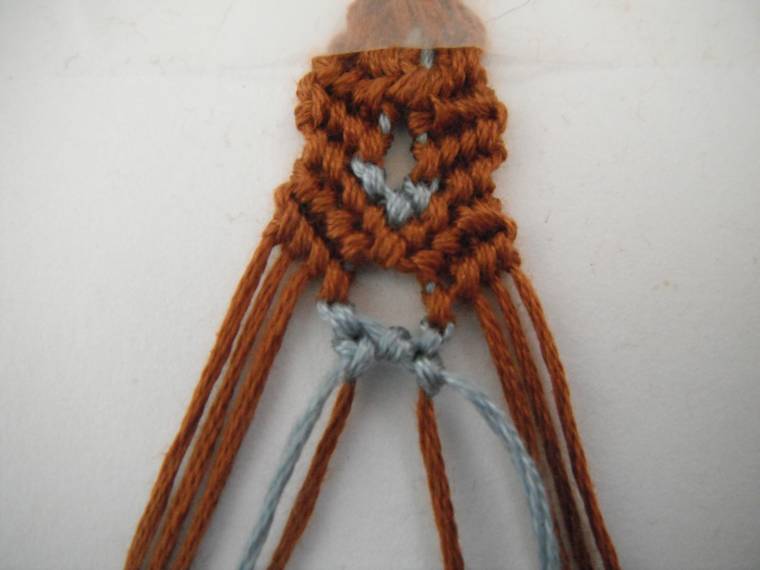
Step Six

Now make a forward knot with the blue string on the left onto the blue string on the right. A small opening will be formed in between the brown knots and the blue knots, so don't worry if you have a large hole.
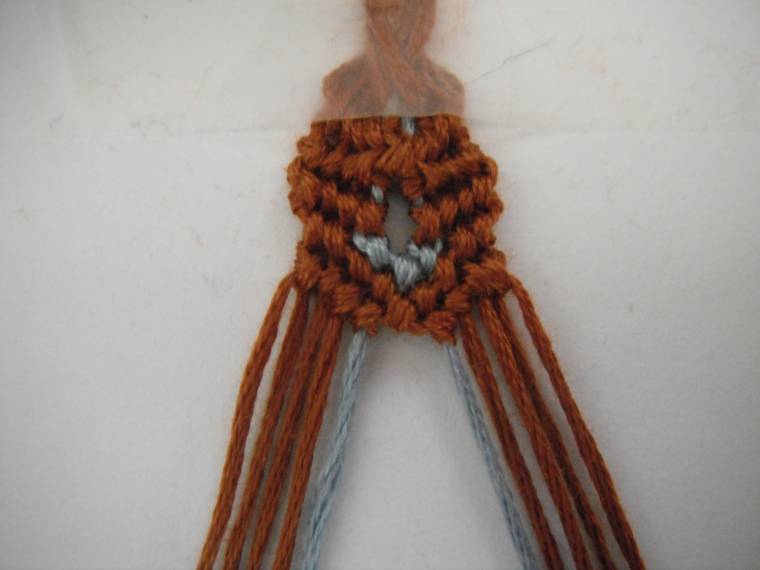
Step Seven
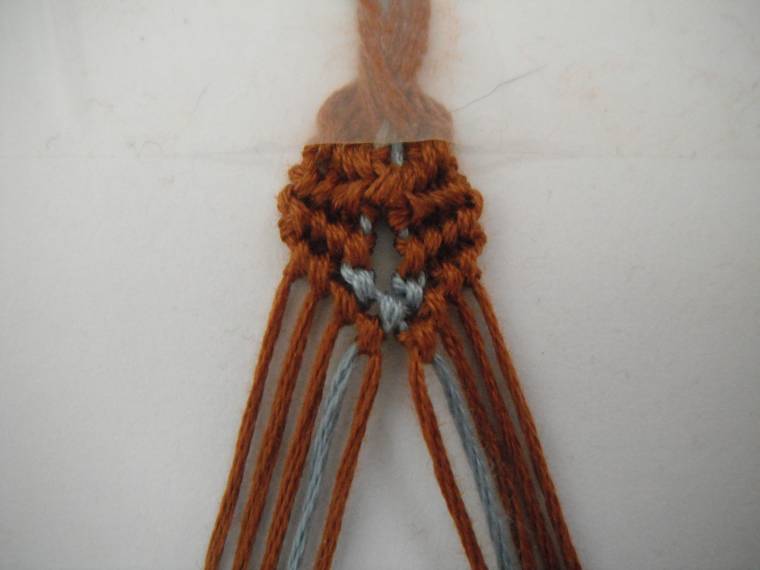
You will now start to work with the brown strings again. Take the outermost brown string on the left and tie forward knots inward and stop once you've tied one on the blue string on the left. Do the same on the right side, using the outermost brown string and tying backward knots toward the center. The string arrangement should now be three browns on each side, one blue on each side, and two browns in the center.
Step Eight
Tie a forward knot with the center brown string on the left onto the brown string on the right.
Step Nine
Now you will repeat step three, and using the two brown strings in the center you'll work back outwards. The string order should now be four brown on the outside of each side, and two blues in the center.
Step Ten
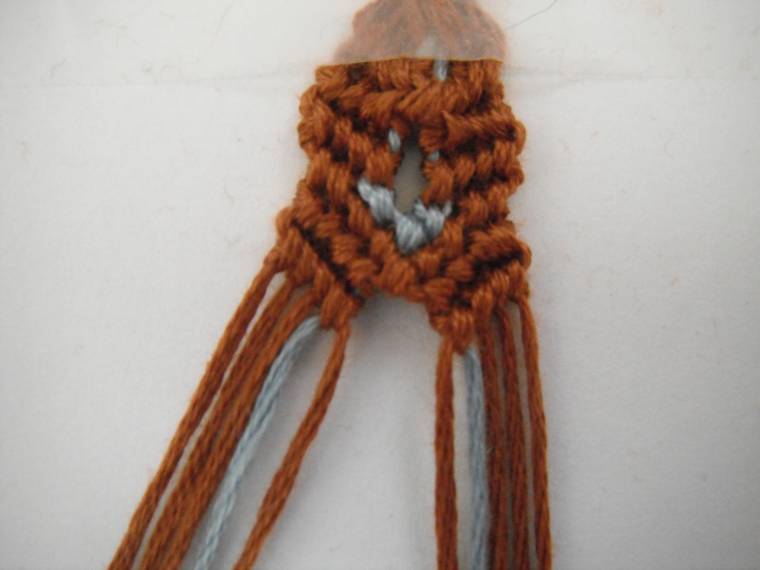
Now repeat step four and work back down towards the center. As before, you will not tie the strings together. The string order will be three brown on the outside of each side, one blue on each side, and two browns in the center.
Step Eleven
Now repeat step five and tie two blue knots onto the centermost brown strings.
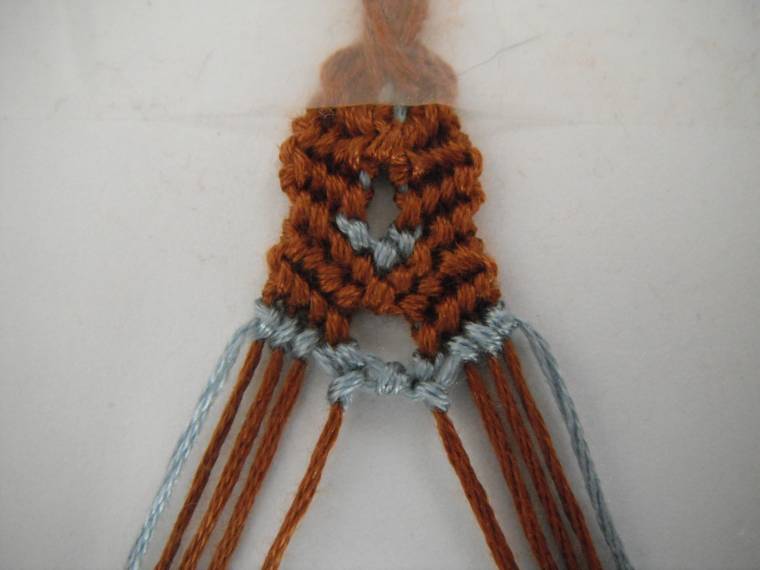
Step Twelve
Repeat step six and tie a forward knot with the left blue string on the right blue string. Another hole will be formed.
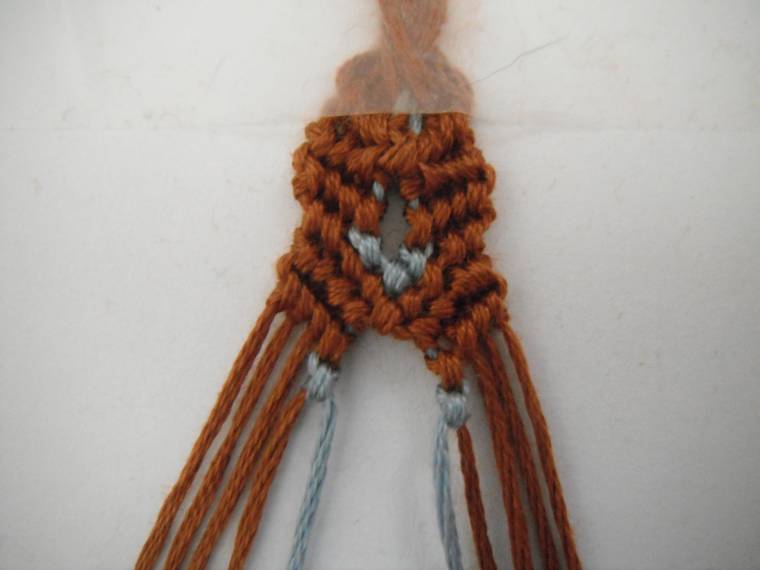
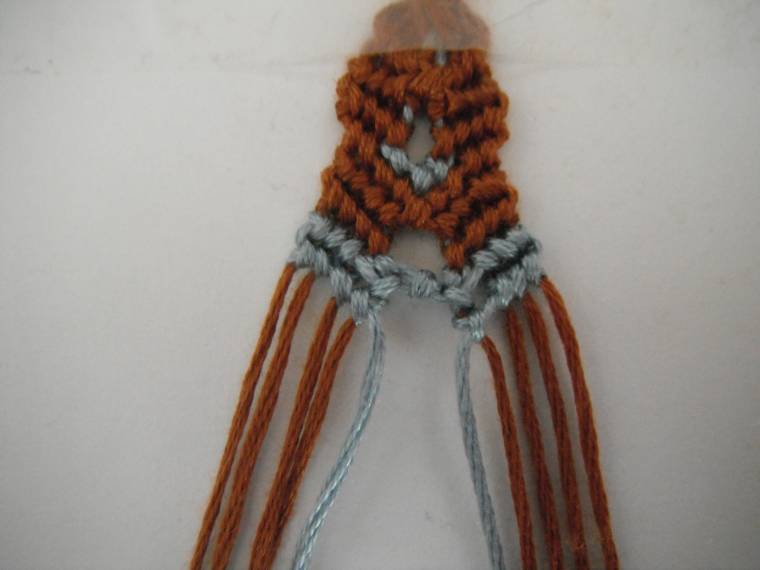
Step Thirteen
Using the blue string on the left, tie a backward knot onto the closest brown string. With the blue string on the right tie a forward knot onto the closest brown string. The strings should now be arranged so there are three brown on the outside, one blue on each side, and two browns are in the center.
Step Fourteen
Now using the blue string on the left, continue tying backward knots up the rest of the brown strings until you reach the last string. Do the same with the blue string on the right, but using forward knots, until you reach the last brown string. The strings should now be arranged so there is one blue on the outside of each side, and four browns in the center.
Step Fifteen
Taking the blue string on the left side, tie forward knots inward and stop after the fourth brown string. Do the same with the blue string on the right side and tie backward knots toward the center and stop after you've reached the fourth brown string.
Step Sixteen
This is the final step. Using the two blue strings in the center, tie a forward knot using the left blue string onto the right blue string. After you've done this you can start over at step one and keep going through the pattern until it's long enough. *
*I've found that rotating through the pattern seven times is usually a good length for most wrists.
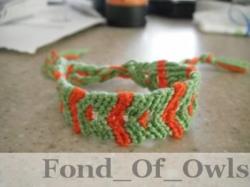
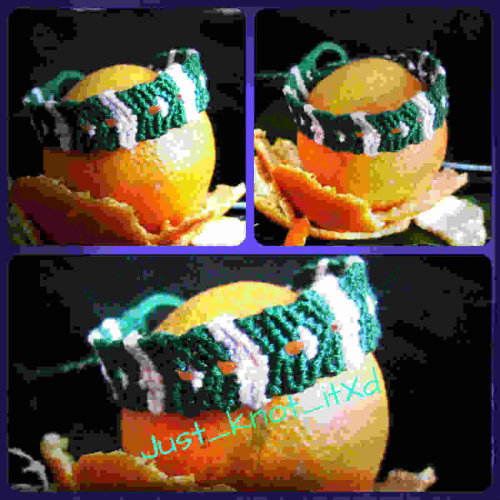
The final product should look something like this:
Editors
The original author of this tutorial is Fond_Of_Owls but it was also edited by ririttt and k_marie.
Uploaded photos (see all 2)
Moderator comments Show comments