#1 - Striped bracelet
| Table of contents |
|---|
| 1 - Teaser video 2 - Introduction 3 - Prepare 4 - Tie the main bracelet 4.0 - Step 1 4.1 - Step 2 4.2 - Step 3 4.3 - Step 4 4.4 - Step 5 |
Teaser video
Thanks to Stefan for this video.
Introduction
This tutorial is supposed to teach you how to tie normal pattern #1, the striped and easiest one. If you want a printer-friendly version in PDF, click here
Prepare
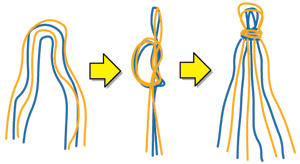
To make this bracelet, you will need yarn or threads in different colours. In this example I've used 8 strings. The length should be about 75 cm when you start to tie. Above you see a solution for starting.
Tie the main bracelet
Step 1

Start with the thread on the left. Make a right-hand knot as the picture shows, and tighten it.
Step 2
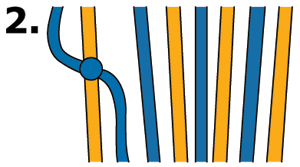
If you've done it right, it will look like this.
Step 3
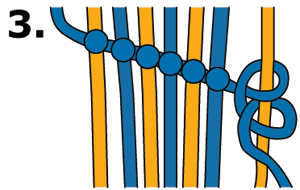
Continue to make right -hand knots with the same thread on the next thread in line. Do so on every thread until you've made one row.
Step 4
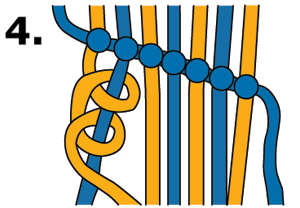
Now you take the thread out on the left again, and do the exact same thing as in steps 1 to 3.
Step 5
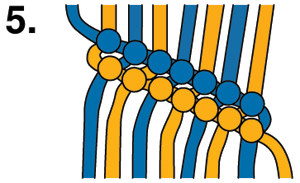
After two rows it looks like this. Go back to step 1 and continue like that in the same way until the bracelet is long enough.
Editors
The original author of this tutorial is Stefan .
Comments