(( Buckle )) Bracelet Buckle
Variation on the Bracelet Buckle - Made With Mixed Knots
This tutorial will show you how to start your bracelet with a simple, quick buckle that can be used with any pattern.
I will be making pattern 58637
Step 1:
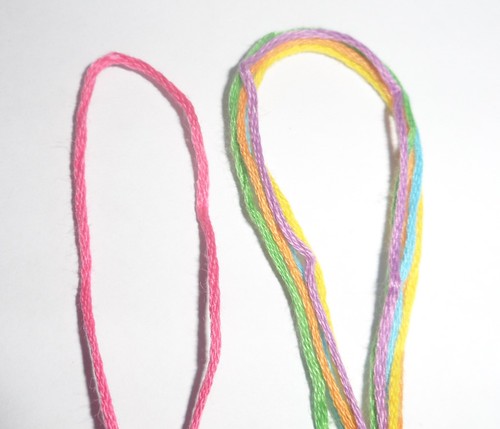
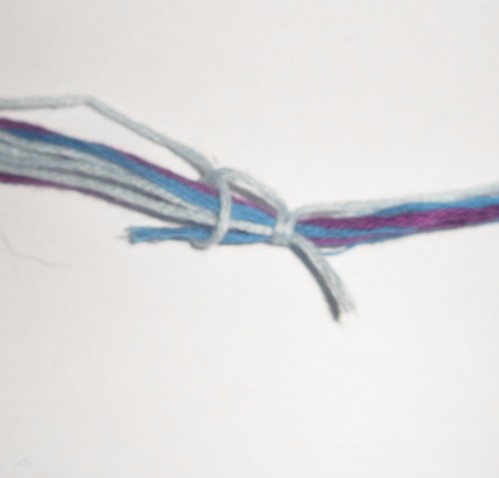
First cut your strings to desired length, making the one you want to use for the buckle about 8 inches (20 cm) - 13 inches (30 cm) longer. Usually I choose the edge string for the buckle. In this case, that would be colour A.
Step 2:
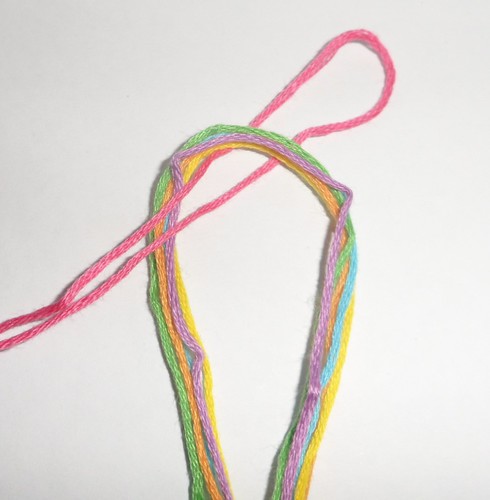
Once your strings are cut, fold them in half and make a lark's head knot.
Step 3:
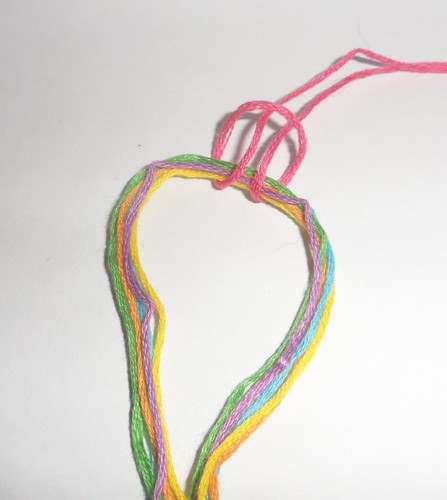
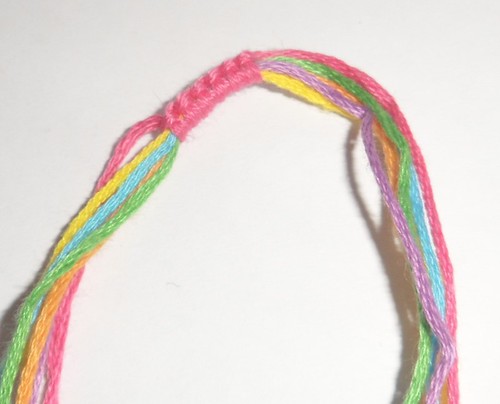
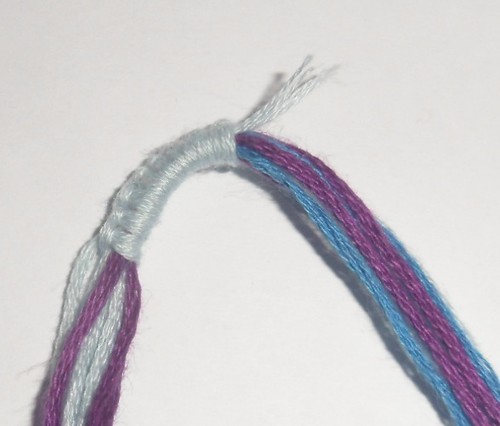
Now you have the middle/start of the buckle done. Starting on one side, alternate doing forward half hitches and backward half hitches for about half an inch. A half hitch is half of one knot you make in normal patterns.
Step 4:
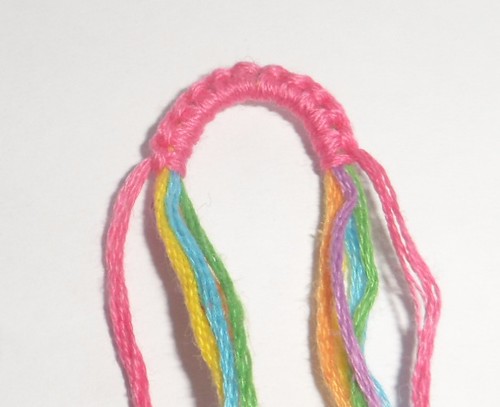
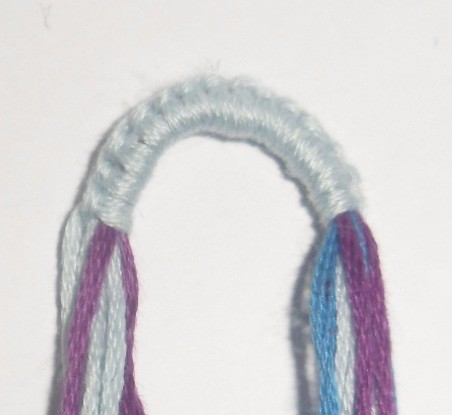
Then, do the other half using the same technique until you get the desired length. Of course this will be larger or smaller depending on how large the pattern is.
Step 5:
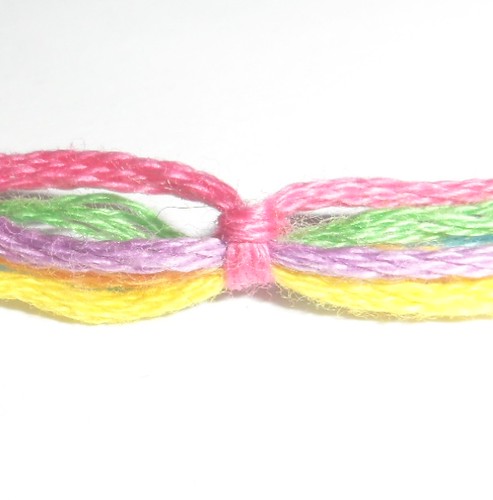
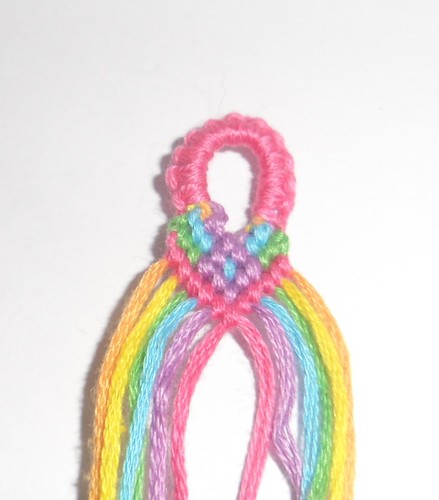
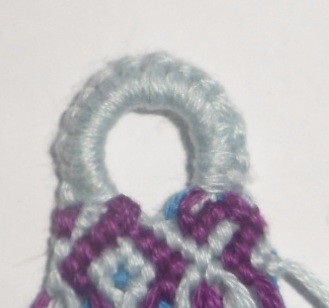
Your buckle is complete! Fold it in half and begin your bracelet. You can use Foz's tutorial if you need help making a straight first row.
How to seamlessly add single strings to the buckle
I will be making pattern 2112
Step 1:
First cut your strings to desired length, making the one you want to use for the buckle about 8 inches (20cm) longer. This pattern has an uneven amount if colors A and C, so I cut half the amount I would normally to fold it plus an inch to hide in the buckle. Usually I choose the edge string for the buckle. In this case, that would be color A.
Step 2:
Once your strings are cut, fold all the longer strings in half. For the loose half strings, place them about an inch past the halfway mark and make the lark knot including them. (If you do not know how to make a lark knot please look above.)

Step 3:
Now you have the middle/start of the buckle done. Starting on one side, alternate doing forward knots(fk) and backward knots(bk) for about half an inch. Make sure you go around the loose strings!
Step 4:
Then, do the other half using the same technique until you get the desired length. Of course this will be larger or smaller depending on how large the pattern is.
Step 5:
Your buckle is complete! Fold it in half and begin your bracelet. You can use Foz's tutorial if you need help making a straight first row.
Coming soon: How to make multicolor buckle!
Editors
The original author of this tutorial is Alicat .
Comments