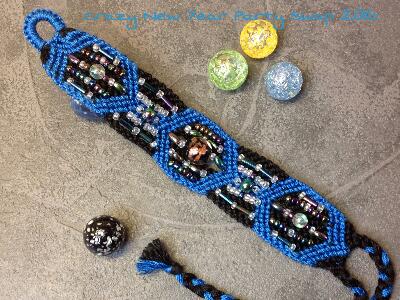
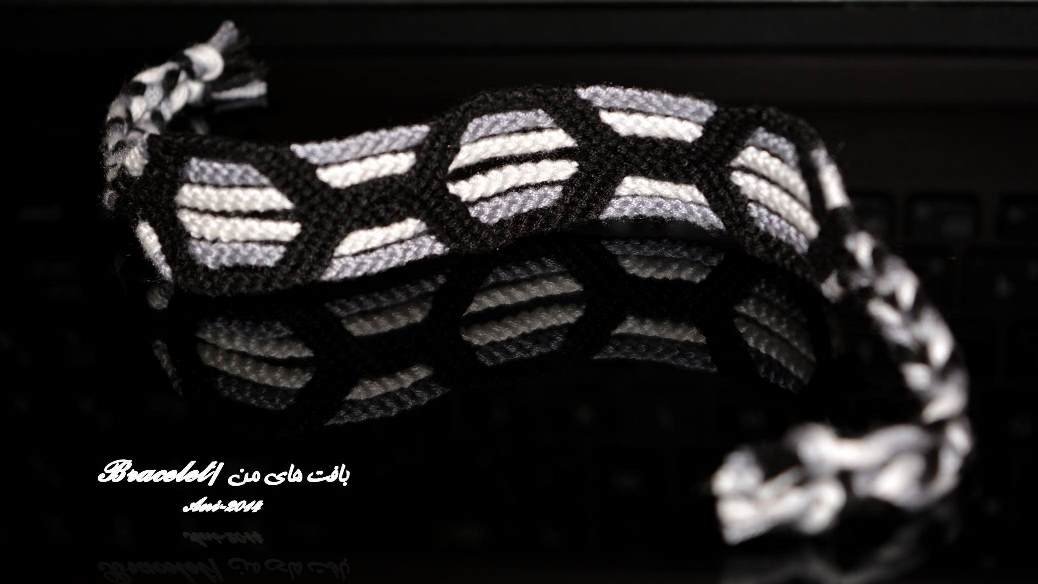
(( Bracelets )) Chained Bridges Bracelet
For this bracelet you will first need to know how to make : a candy stripe with forward knots, a candy stripe with backward knots, normal chevrons, inverted chevrons

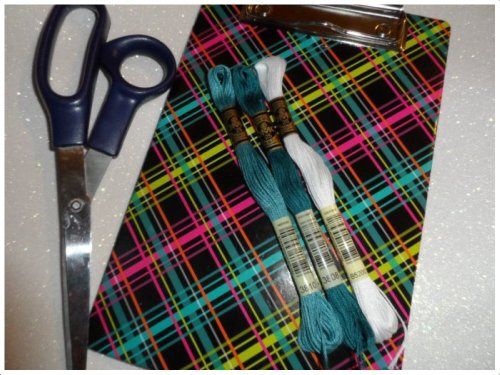
Supplies
- 3 colors of string; 6 strands of each color; (one color will be used more than the other two, so these strings will need to be longer)
- scissors
- clipboard
Set-up[/h2]
I chose to start my bracelet with braids. I started first with a knot, until I got further along in the bracelet, then braided them later on. But you can start your bracelet any way you want to: buckle, shape-d V, etc.
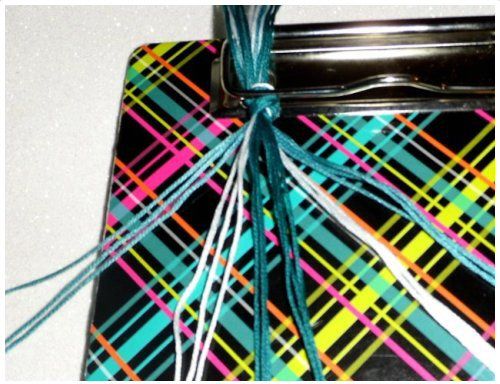
You will need to set up the strings into sets of three.
CCCBBBAAA AAABBBCCC ?(please note Strings A will be the longer strings and used more often)
For my bracelet ? A : dark teal, B : white, C : light teal
[h1]Pattern/Directions
Step 1
: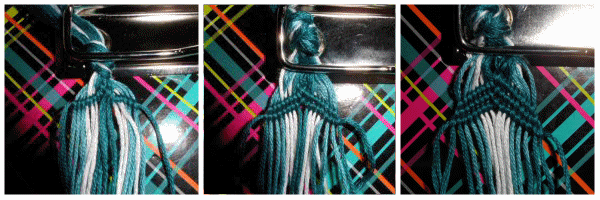
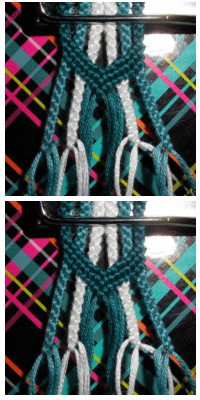
You will be making an Inverted Chevron again.
Make a forward knot with the middle to String A?s.
Working on the RIGHT side, using String A make forward knots across all of the strings to the right
Working on the LEFT side, using String A make backward knots across all strings to the left
Repeat this until you?ve got 3 rows of String A (See above photos)

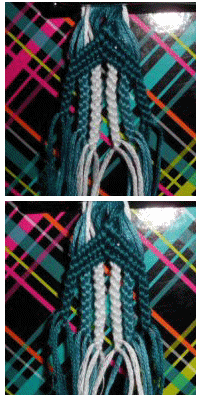
You strings should now be: AAACCCBBB BBBCCCAAA
Take each section of three strings, you will be making thin candy stripes.
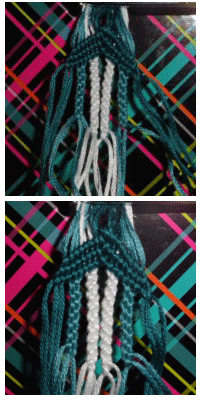
Step 2
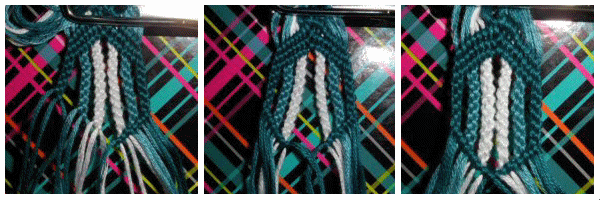
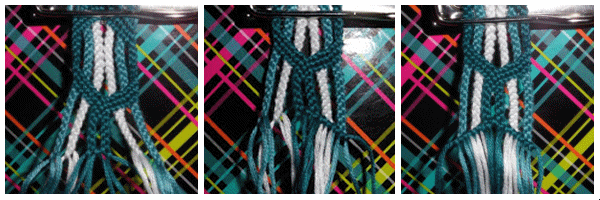
String B (White)
Working on the LEFT side of the chevron: Make 9 rows of backward knots on the left, (see photo 1 top); Then with the first two strings make a backward knot. (see photo 1 bottom)
Working on the RIGHT side of the chevron: Make 9 rows of forward knots to the right ; Then with the first two strings, make a forward knot)
Step 3
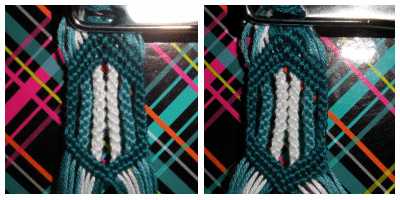
String C (Light Teal)
Working on the LEFT side of the chevron: Make 7 rows of backward knots on the left, (see photo 2 top); Then with the first two strings make a backward knot. (see photo 2 bottom)
Working on the RIGHT side of the chevron: Make 7 rows of forward knots to the right ; Then with the first two strings, make a forward knot)
Step 4
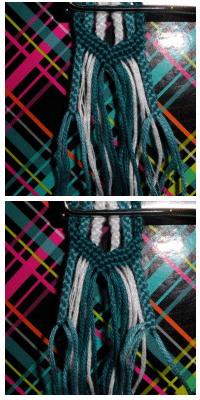
String A (Dark Teal)
Working on the LEFT side of the chevron: Make 5 rows of backward knots on the left, (see photo 3 top); Then with the first two strings make a backward knot. (see photo 3 bottom)
Working on the RIGHT side of the chevron: Make 5 rows of forward knots to the right ; Then with the first two strings, make a forward knot)
Step 5
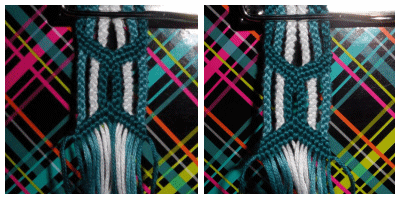
You will be making a normal chevron.
Working from the RIGHT side, make backward knots across all the strings on the right with the first String A (8 strings)
Working from the LEFT side, make forward knots knots across all the strings on the left with the first String A (8 strings)
Connect both String A?s you just knotted with using a forward knot.
Repeat this step til you?ve got three rows of String A (See above photos)

Step 6
String C (Light Teal)
Working on the LEFT side of the chevron: Make 5 rows of forward knots on the left, (see photo 1 top); Then with the first two strings make a forward knot. (see photo 1 bottom)
Working on the RIGHT side of the chevron: Make 5 rows of backward knots to the right ; Then with the first two strings, make a backward knot)
Step 7
String B (White)
Working on the LEFT side of the chevron: Make 7 rows of forward knots on the left, (see photo 2 top); Then with the first two strings make a forward knot. (see photo 2 bottom)
Working on the RIGHT side of the chevron: Make 7 rows of backward knots to the right ; Then with the first two strings, make a backward knot)
Step 8
String A (Dark Teal)
Working on the LEFT side of the chevron: Make 9 rows of forward knots on the left, (see photo 3 top); Then with the first two strings make a forward knot. (see photo 3 bottom)
Working on the RIGHT side of the chevron: Make 9 rows of backward knots to the right ; Then with the first two strings, make a backward knot)
Step 9
You will be making an Inverted Chevron again.
Make a forward knot with the middle to String A?s.
Working on the RIGHT side, using String A make forward knots across all of the strings to the right
Working on the LEFT side, using String A make backward knots across all strings to the left
Repeat this until you?ve got 3 rows of String A (See above photos)
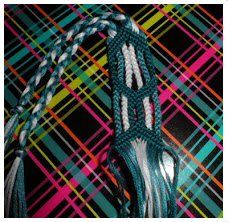
This is how your bracelet should look after doing steps 1-9.
You'll notice you're back to step 2 now.
Repeat steps 2-9 until you're bracelet is knotted to your desired length :)
Editors
The original author of this tutorial is k_marie but it was also edited by feathercutie and Kestrel.
Uploaded photos (see all 18)

Moderator comments Show comments