(( Bracelets )) Kumihimo Flat Braid
| Table of contents |
|---|
| 1 - Materials 2 - Step by Step 2.0 - Step 1 2.1 - Step 2 2.2 - Step 3 2.3 - Step 4 2.4 - Step 5 2 - Spiral Variation 3 - Patterns 4 - Video |
Materials
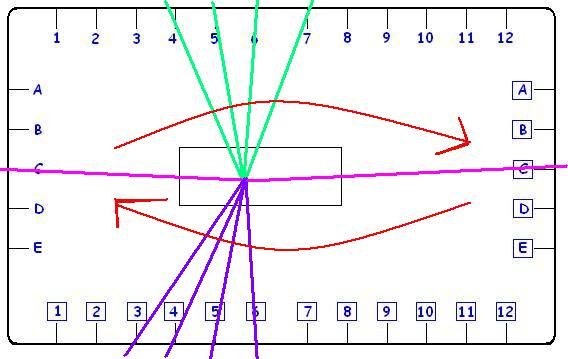
A Kumihimo Plate (you can print out the picture and make your own out of cardboard or dense foam)
3-5 (or more if you so desire) 20 inch strings in two colors (so 6-10, or more)
2 strings about 40 inches long of a third color
In this example I will use purple, green and pink and it will be 4 strings wide.
So:
4 purple at 20 inches each
4 green at 20 inches each
2 pink at 40 inches each
Here is a picture of the Plate:
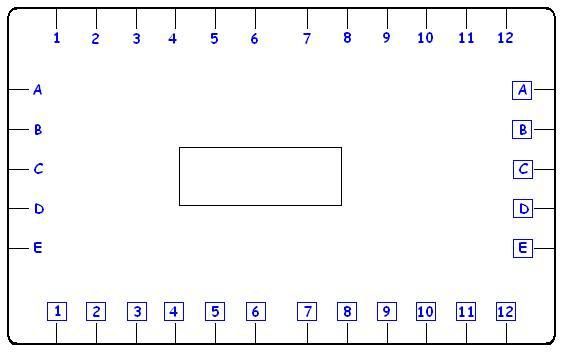
Step by Step
Step 1
Tie your strings together and assemble them so that all of one color is at the top, all of the second color is at the bottom and one string each of the third color are to the left and right.
Like this:

Step 2
Going from left to right, start at the top and move the first string to the first empty slot on the bottom. Move the first string from the bottom up to the newly vacant spot at the top.
Like this:
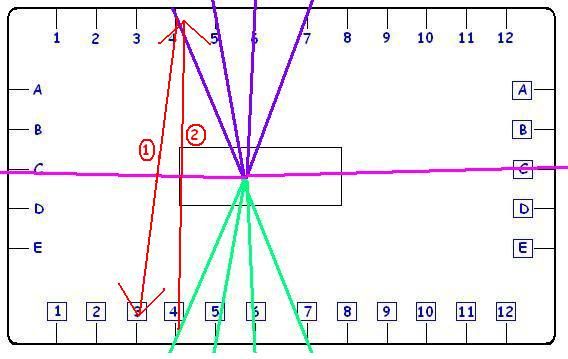
Now it will look like this:
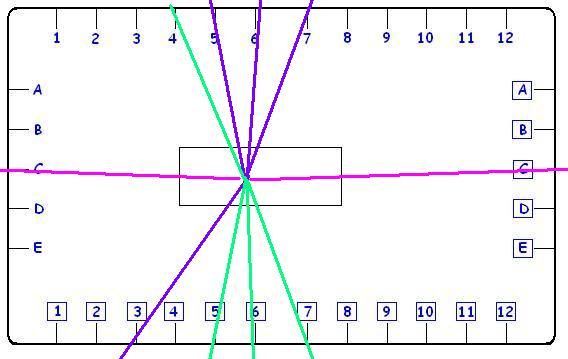
Step 3
Continue doing this until all of you strings (except the two on the sides) are opposite of where they started.
Now pull your side strings tight so that everything comes together in the middle.
Like this:
::Important Note:: Not pulling the side strings will make a looser pattern. Pulling them after crossing will create a spiral, but I will talk about that at the end of this tutorial.
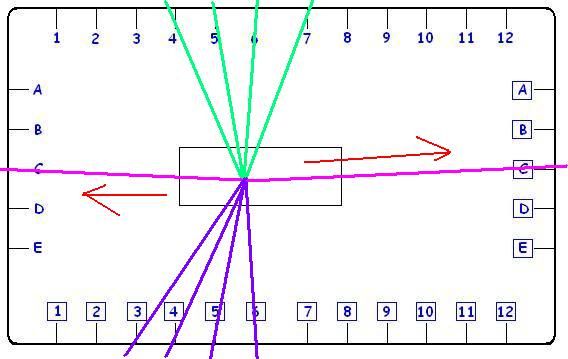
Step 4
Cross the left side string to the right, and the right to the left.
I like to always start with the left and cross over the top to keep it even.
Step 5
This is important. Turn your Plate upside down. Your purple, or starting color, should be at the top again. Now repeat steps 1-4. Continue until your bracelet is the length you desire.
Spiral Variation
Turing this from a flat braid into a spiral braid is as simple as pulling the side string tight both before and after you cross them.
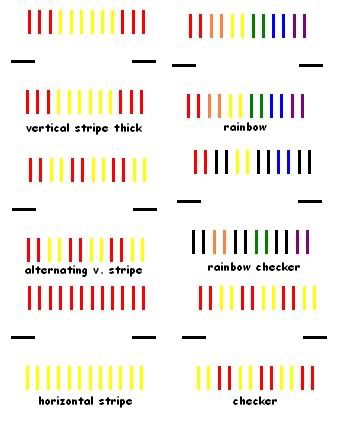
Patterns
Video
Here is a video from zsylvester
Editors
The original author of this tutorial is AutumnRane .
Comments