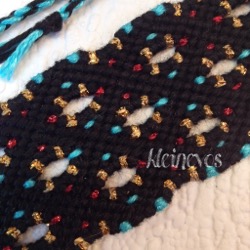
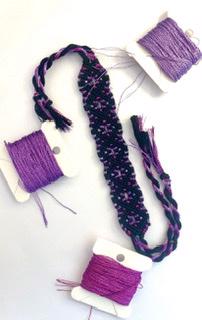
(( Bracelets )) Starry Night 'shaped' Bracelet
It uses the shaped bracelets-technique .
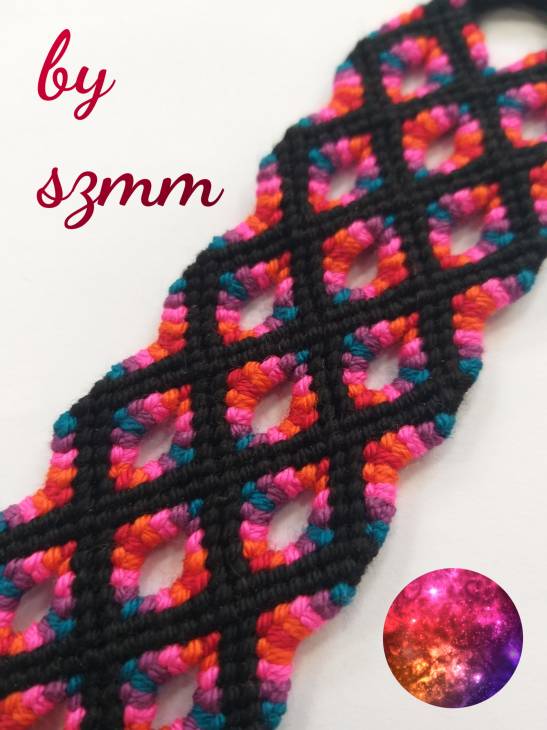
This picture shows a doubled version of this pattern:
The Inside
Step 1 - 4
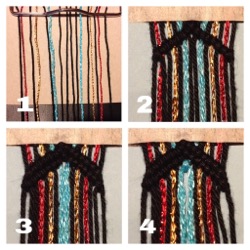
Step 1
String order: A B A C A D AAAA D A C A B A
The first and last A are border-strings. You can leave them out if you want.
Step 2
Take one of the middle black strings and knot it (like a chevron) around all of the strings, to the outside. Every last knot will be a forward-backward knot, or a backward-forward knot when you're knotting the left half of the bracelet.
Step 3
Take another middle black string and repeat the previous step.
Step 4
Knot the blue strings D together.
Step 5 - 8
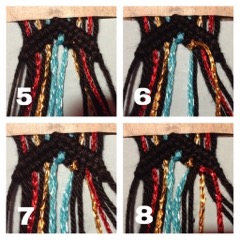
Now the shaping will start:
*Every next step will describe the knotting of the right half. The left half will be the same, but mirrored.
Step 5
The black string is knotted around the blue string with a backward-forward knot.
Step 6
The golden string is knotted around both blue and black strings, with a backward-forward knot.
Step 7
The next black string is knotted around only the golden string, with a backward knot.
Step 8
The red B string is knotted around the golden string, with a backward-forward knot.
Step 9 - 12
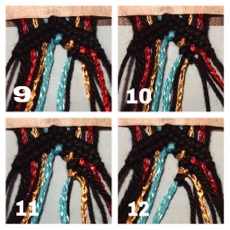
Step 9
The black string (same as used in step 7) is knotted around the blue and black strings, with a backward-forward knot.
Step 10
The same black string is knotted around the golden string, with a forward knot.
Step 11
Repeat step 6: Gold around blue and black.
Step 12
Repeat step 5: Black around blue.
*Alternative Way of Knotting Step 7 - 10
You can also do the shaping like this. It doesn't make much difference for the final bracelet. The last picture shows both ways, the bottom one is the 'alternative' knotted version.

*Alternative Step 7
Knot the black string around blue, black and gold, with a backward-forward knot.
*Alternative Step 8
Knot the red string around the previously used black string, with a backward-forward knot.
*Alternative Step 9 and 10
Repeat step *7.
Step 13 - 16
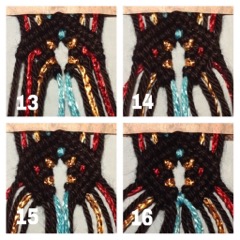
Step 13
Repeat everything on the left side.
Step 14
Knot the black strings next to the red strings from the outside to the middle, like a chevron.
Step 15
Repeat step 14 with the next black strings.
Step 16
Knot the blue strings together and finish the black 'chevrons'.
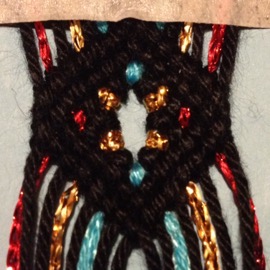
One square of the bracelet finished:
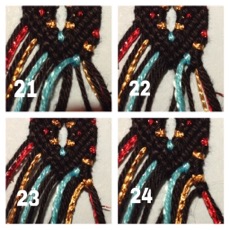
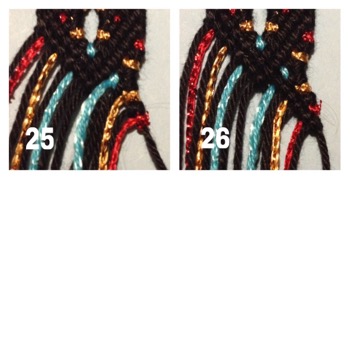
The Sides
The sides are knotted just like the middle squares, only half of it. These pictures show the knotting of the sides with the alternative steps *7, 8, 9, 10.

Video
Video tutorials for this bracelet:
Editors
The original author of this tutorial is kleinevos but it was also edited by Masha_Knots and halokiwi.
Uploaded photos (see all 9)
Comments