(( How to... )) Edit and Save Normal Pattern Colours
| Table of contents |
|---|
| 1 - Introduction 2 - Saving Changes |
Introduction
A lot of users have been looking for a way to edit the colours on patterns already submitted to the site, for their own usage Please don't hit the 'save'-button! We never accept re-colored existing patterns. This tool is only meant to make it easier to follow the pattern in the colors you want to use.
You can however also use this generator for creating new patterns. But please make sure to change a pattern enough to make it different enough from existing patterns before hitting that save-button.
Here I am to show you a way to do just that for normal patterns :)
Bear in mind, the tools I'm going to show you today exist for definite on Windows Vista, 7 and 8, and MAC (at the bottom)
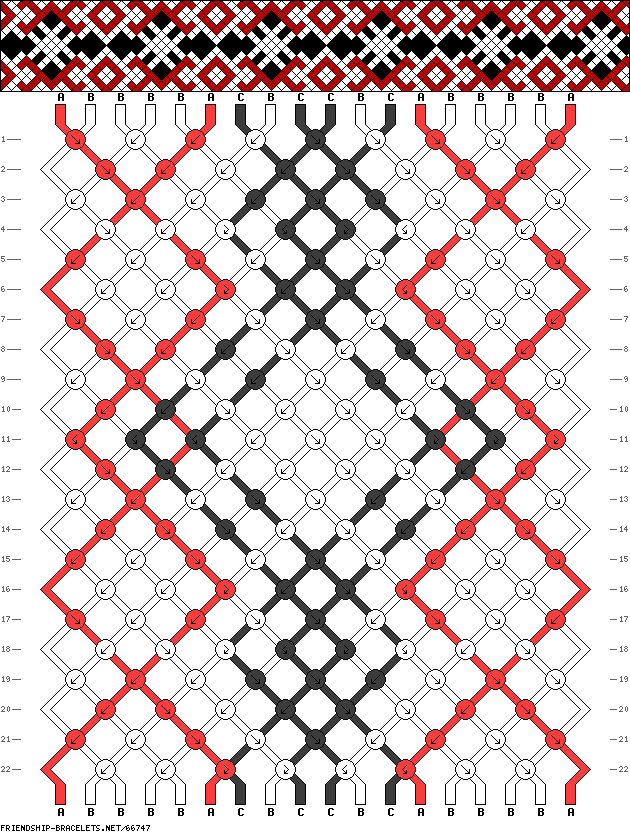
For this example I'm going to use pattern #66747:

And we're going to use the pattern editor, available here: https://www.friendship-bracelets.net/js_gen.php?edit=66747
(to change which pattern you wish to edit, simply delete the 66747 out of the url, and change the numbers to those of the normal pattern you want to edit. It really is just that simple!)
Saving Changes
Now, changing pattern colours is all very well and good, but what if you want to save your changes to your hard drive? Saving those changes allows you to refer back to your own colour choices in the future, and it means you don't have to specifically knot the pattern right then and there in order to remember what colours you chose! However, there's a way to do it that is far better than creating multiple screenshots - the Snipping Tool!
In Windows 8:
Go to Search, and type in "Snip". The Snipping Tool should show up as a search result. For ease, pin it to your taskbar, so it's readily available when you need it for your browser.
In Windows Vista and Windows 7:
Go to Start
Go to All Programs
Click on Accessories
Finally, click on Snipping Tool
Note: for Windows Vista, you'll also need the Tablet PC Optional Components feature enabled before you can use Snipping Tool. If you use Vista and find that you can't access the Snipping Tool, please refer to these instructions for switching the Tablet PC Optional Components feature on. However, it should be enabled by default.
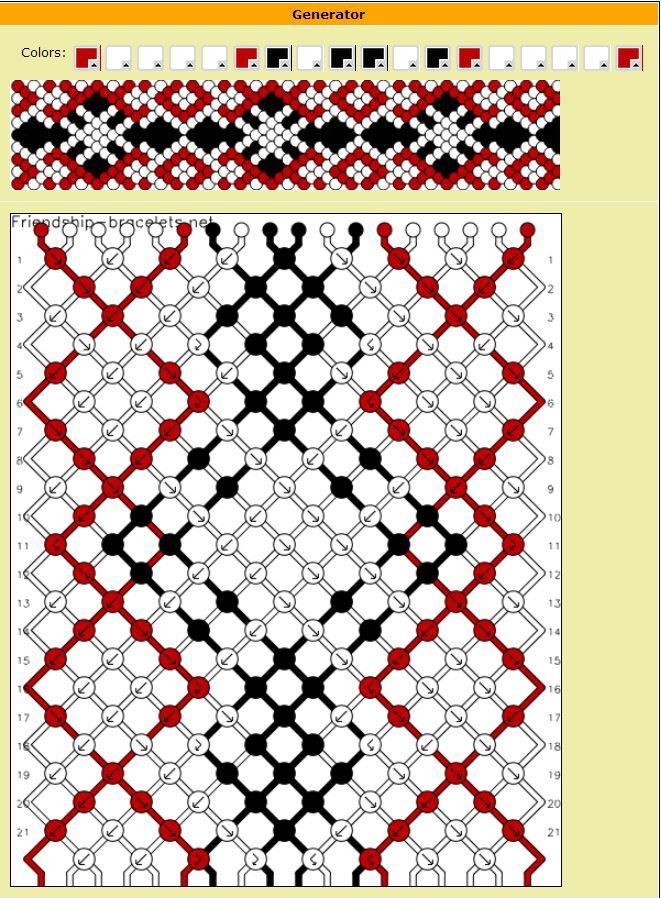
When you open up the pattern editor, you should see a box that looks like this:

The row of boxes at the top allows you to change your colours as you please, but what happens when you want to save your changes? The editor will only allow you to save them to the site as a new pattern, but it isn't a new pattern, it's only recolored (so don't save it !!) and that's where the Snipping Tool comes in.
Click on the Snipping Tool to open it, and take a quick check of what your current options are. Your default options should be perfectly good, but taking a quick look at it will allow you to see what kind of things Snipping Tool can do. Now, close the Options box, and click on "New". At this point, your screen should grey out, and you can click anywhere on screen to draw a box to "snip".
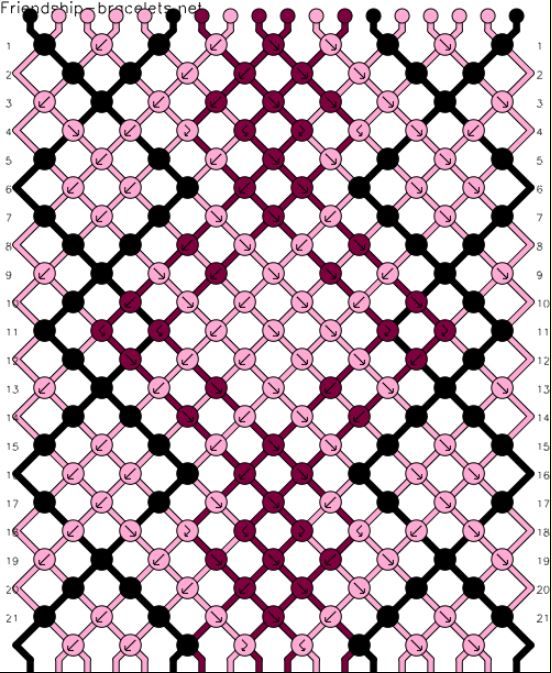
Make sure you're currently on the browser tab that has the pattern editor open. With Snipping Tool open, click on "New", and draw a rectangular box over the pattern grid diagram. When you release your mouse, the "snipped" part of your screen will appear in Snipping Tool, and you can save your snip. Click "Save", choose where to save it and what to name it, and it'll be sitting, ready and waiting, on your hard drive, for when you're able to actually knot the pattern.


For MAC users:
When you are ready save the pattern, press (command)+(shift)+(4).
This will give you a cursor that will allow you to select the part of your screen you want to save as a screenshot.
When you let go, your screenshot will automatically be saved to your desktop.
Editors
The original author of this tutorial is Kestrel .

Comments